Table of Contents
- Why Your Kitchen Island Needs a Culinary Traffic Plan
- Comparing Whole-Grain, Sourdough, and Chickpea Dough Foundations
- Replacing Heavy Dairy with Whole-Food Sauces and Nut Creams
- Preventing the Soggy Center: Moisture Control and Topping Pairings
- Guiding Guests Through the Bake and the Lycopene Advantage
Why Your Kitchen Island Needs a Culinary Traffic Plan
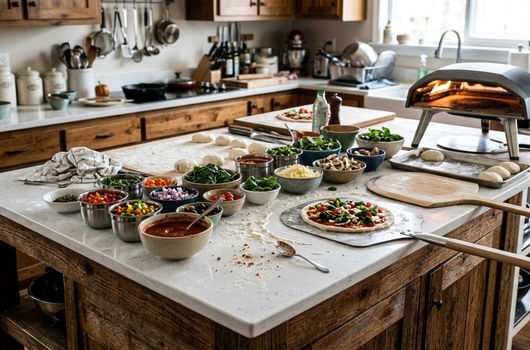
Semolina dusts a warm kitchen island. Six dinner guests crowd one wooden peel, watching a crust blister in the oven. The pie looks finished. The line behind it does not.
That shared peel is the evening's bottleneck. Wet toppings, a crowded landing strip, and a single oven door turn a friendly table into a queue. Six people can assemble at once. Only one pizza can launch.
WhyFoodWorks uses the island as a teaching surface. Guests shift from passive plates to hands-on assembly, and the host keeps the hot zone. Clinical ideas live in the arrangement. Modest crusts plus fiber, protein, and seeds keep glycemic load in view. Color across the bowls carries phytochemical variety without a lecture before the first bite.
Split assembly from the launch
Guest work stays on the far side of the island. Reserve a clear 45–60 cm landing area beside the oven for the peel and a hot-pan trivet. Nobody reaches across a blistering steel for basil.
For six guests, prepare six personal crusts, each 18–20 cm across, plus one extra crust for a torn base or a late arrival. A residential oven set to 245–260°C can carry the sequence once crusts already have structure. Pre-baking supplies that structure before the shorter topped bake.
Give a 2–3 minute demonstration on one crust. Spread a thin sauce layer. Distribute three toppings. Leave the rim clear. Then step back. The demonstration is the lesson. The rest of the evening is practice.
Peel Lane
One person owns the peel. Everyone else builds on the opposite side of the island from the oven.
Comparing Whole-Grain, Sourdough, and Chickpea Dough Foundations
Three foundations earn a place by handling behavior and ingredient composition. Assigning a universal health ranking would flatten the differences that actually matter at the counter.
Sprouted whole-wheat sourdough
Sprouted whole-wheat sourdough offers whole-grain flavor and a network that bran keeps interrupting. Guests stretch it gently. After the dough has begun fermenting at room temperature, 24–48 hours in the refrigerator is the cold window used here. That long ferment is the point to explain at the table: time and acidity reduce phytic acid, which supports mineral bioavailability and makes the gluten fraction easier for many wheat-tolerant guests to digest.
For a whole-wheat trial batch, begin with 360–390 g water per 500 g flour. Count flour and water already in the starter toward those totals. Rest the mixed flour and water for 30–45 minutes before judging stickiness. High-bran flour drinks water. A dough that feels slack at minute five often tightens after the rest.
Equal-weight spelt and bread flour
Combine 250 g whole-grain spelt flour with 250 g bread flour and begin with 330–350 g total water. The blend stretches more willingly than a fully bran-heavy dough. Conventional bread flour also makes this a partly refined option: useful when some guests have never handled whole grain, and less aligned with a fully whole-food brief.
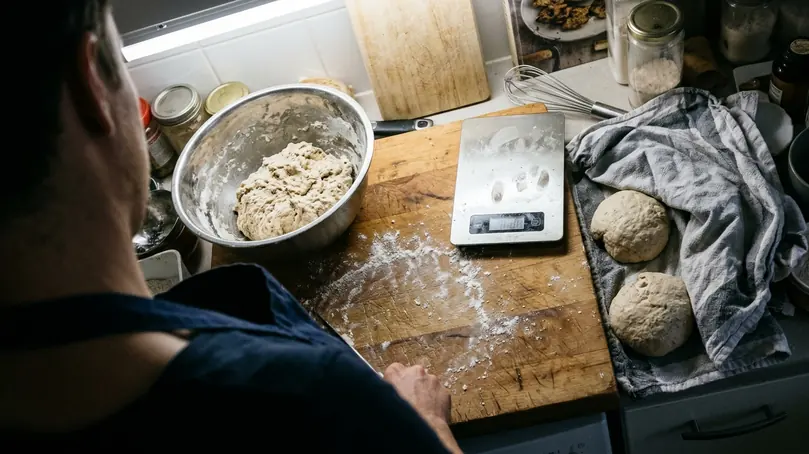
Portion 140–160 g dough balls. In a 21–24°C kitchen, pull them from the refrigerator 90–120 minutes before shaping. Stretch wheat dough to 18–20 cm, keeping the center roughly 3–4 mm thick.
Chickpea-cassava flatbreads
For a small test batch, whisk 100 g chickpea flour, 25 g cassava flour, and 170–190 g water. Rest 20–30 minutes. Cook thin rounds in a well-seasoned skillet until both surfaces set. These bases skip gluten and skip the peel-and-stretch step. Run them as a separate station.
Bran Hydration
High-bran flours absorb far more water and tear if guests pull them paper-thin. A three-minute pre-bake on the heated surface, stopped at a matte, set center, hands the crust from dough work to guest assembly. A fully browned base at this stage has already spent its oven time.
Sprouting and sourdough fermentation leave wheat and spelt unsafe for celiac disease. Chickpea-cassava bases need gluten-free ingredients and utensils that have not touched wheat dough. Put that boundary on the prep list before anyone stretches the wrong ball.
Replacing Heavy Dairy with Whole-Food Sauces and Nut Creams
Commercial plant shreds vary from package to package. Read the label in hand. The sauces on this bar are chosen by the job they perform.
Three bases, three jobs
Drained crushed tomato, a clean San Marzano-style crush with raw garlic, supplies acidity. White bean puree with roasted garlic and rosemary supplies creamy body, soluble fiber, and plant protein. Pumpkin-seed basil pesto supplies concentrated flavor and seed-derived fats. Magnesium and zinc figures for those seeds, and for the grains in the doughs, are listed in the USDA FoodData Central nutritional profiles for whole grains and seeds.
Portions stay small on an 18–20 cm crust. Begin with 2 tablespoons of tomato sauce or bean puree. Use 1 tablespoon of concentrated seed pesto. A heavier hand reads as generosity and bakes as soup.
Blend one drained 400 g can of white beans with 3–4 roasted garlic cloves, 1 teaspoon chopped rosemary, and 2–4 tablespoons water. Add the water gradually so the puree stays spreadable.
Dollop and drizzle bowls
Finishing fats go on after the bake, or in amounts too small to flood the center. Offer cultured cashew ricotta in teaspoon-sized dollops. Set out a bowl of 3 tablespoons hemp hearts mixed with 1 tablespoon nutritional yeast. Call that yeast a vitamin B12 source only when the package confirms fortification. Finish with a tahini-lemon drizzle of 1–2 teaspoons per personal pizza.
Keep nut and seed creams refrigerated at 4°C or colder until service. Put out small bowls. Replenish from the refrigerator so a warm kitchen does not hold a large tub for the whole evening.
Preventing the Soggy Center: Moisture Control and Topping Pairings
Vegetable water is the main controllable cause of a soggy center. A short bake gives raw mushrooms and zucchini little time to shed moisture before it reaches the crust. The dough turns sponge. The fix is prep, finished before guests arrive.
Pre-treat the wet produce
Slice cremini or shiitake mushrooms 4–6 mm thick. Dry-sauté 200–250 g per batch in a 28–30 cm skillet over medium-high heat for 7–10 minutes, stirring until pooled liquid has evaporated. What remains is concentrated savory flavor. The water is gone. The taste stays.
Slice zucchini 3–4 mm thick. Roast in a single layer at 220°C for 12–18 minutes, turning once. Stop when the surfaces look dry, with browned spots. Cool uncovered so steam can leave.
Remove tough kale ribs and tear leaves into 2–3 cm pieces. Massage a small bowlful with 1–2 teaspoons water, then blot dry before service. The leaves soften enough to char in a loose scatter.
Drain artichoke hearts and pickled onions in a sieve for 10–15 minutes. Blot them before they enter a topping bowl. Brine left behind will migrate to the center of the pie.
Bowls by flavor function
Random placement invites a pile of whatever sits closest. Group bowls by what they contribute.
- Base umami: caramelized onions and sun-dried tomatoes, already low in free water.
- Earthy crunch: drained artichoke hearts and toasted pine nuts.
- Post-oven freshness: microgreens, fresh basil, and the blotted pickled red onions, added after the pie leaves the heat.
Loading Gaps
Choose three or four toppings, keep them in one loose layer, and leave visible gaps. Treat that cap as a loading habit for a short residential bake.
Guiding Guests Through the Bake and the Lycopene Advantage
Run the counter from left to right: par-baked crusts, base sauces, cooked warm toppings, a clearly marked post-oven finishing area, then the launch zone, kept dry and dusted with coarse cornmeal. Guests pass the finishing bowls during assembly and use them after the bake. Basil stays green. The peel stays free of oil.
One person on the oven
Guests do not compete for the peel. The host script is short enough to repeat without a speech: "Sauce thinly, choose three toppings, and leave the basil here for after baking. Bring your pizza to me; I handle the oven."
Preheat an oven-rated baking steel or cast-iron surface at 245–260°C for 45–60 minutes before the first topped pizza. Schedule a starting window of 6–8 minutes for each topped, par-baked crust. Inspect at 4 minutes. Turn the pie if the back edge is browning faster. Remove it when the underside is firm and the toppings are hot.
Dust the launch peel lightly with roughly 1 teaspoon coarse cornmeal for a personal pizza. Shake to confirm the crust moves. Brush excess meal away between launches so the next guest inherits a clean board.
Cut each 18–20 cm pizza into 6–8 small tasting pieces and serve at once while the next pizza enters the oven. A single-oven queue becomes a tasting flight. Everyone samples more than one combination. Six full pies never have to land at the same minute.
Heating tomatoes alongside whole-food culinary fats thermally isomerizes trans-lycopene into cis-lycopene, a structural shift that makes this antioxidant substantially more available to digestion than the same tomatoes eaten raw in a cold salad.