DIY serving tray (+kitchen sink breakfast cookies)
Beautiful/functional
That’s a mantra I’ve been trying to embrace more and more – I love the utility of a tool or gadget that works well, a foolproof system, an airtight plan…but ultimately, creating beauty in spaces around me makes me feel deeply, purely, happy. At the same time, I like things that are decorative or aesthetic to have another layer of meaning, significance, or purpose. This little project is the perfect intersection of both!
I lived in DC for 7 years, and moved outside the beltway to Reston just last March…it’s a step closer to the country, which is the direction I’m heading, but there’s a lot about the city I miss. My vibrant neighborhood of Columbia Heights, farmer’s markets within walking distance, great restaurants right around every corner, the buzz of purpose and power in the air…being delayed by motorcades and slow moving tourists…fine ok, maybe not the last two! But the city and the people I met there was a formative part of my adult life, and it will always have a special place in my heart.
When ModernMapArt reached out to ask if I’d like to have a print to feature on the blog*, I was immediately inspired by the DC print and an idea I’ve had rattling around for a while to make a decorative (beautiful), useful (functional) serving tray. Their bold, graphic prints are stylish and also invite conversation and interaction, since they’re based on real maps of countries and cities people love, ski trails, and city skylines. They even have a “custom” option, where you can zoom in on any location and title it as you like (housewarming gift, anyone?!) – perfect for people who don’t live in big cities or famous towns. 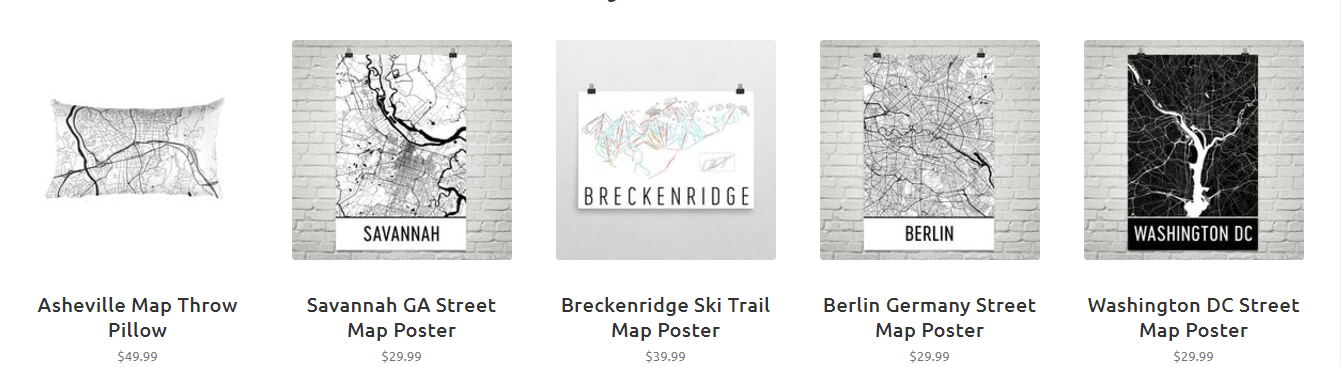
They also have pillows and iphone cases, and they print and ship right from the USA. And they’re priced really well – which allows a bit for a framing budget!
For this project, I chose a thicker, sturdy frame made of solid wood and a back held on by strong metal pins – I got it at Michael’s, and it was $35 (before using their always-circulating coupons!). Add a few handles (usually only a couple bucks each) and the whole project comes in at under $90. Here’s how it comes together:
- Measure to the mid-point of the sides of the frame you want to place handles; position and mark with a pencil
- Drill with a bit the same size, going almost to the bottom, but not through it
- Insert handle to ensure fit, then remove and add a drop of glue (I like non-expanding Gorilla glue) before placing in permanently
- Allow to dry per glue instructions, then choose a spot to hang your new art/tray (artray?) – both handily available when you need to ferry some drinks or snacks out to the patio, and attractive as it’s stored in plain sight


And maybe, since cookies and tea is a nice snack, consider making these to go along with a nice Early Grey! I’d love to know if you try either the recipe or the framed tray how they turn out, so shoot me a message or tag me in a picture!

| Prep Time | 10 minutes |
| Cook Time | 20 minutes |
| Servings | cookies |
- 1/8 cup canola or coconut oil
- 1/4 cup honey
- 2 eggs
- 1/2 cup peanut butter
- 1 cup rolled oats
- 3/4 cup nuts of choice (I used pecan pieces)
- 1/2 cup shredded coconut (mine was sweetened)
- 3/4 cup dried fruit of choice (I used dried cherries)
- 1/2 cup chocolate chips or chunks
- 2 Tbsp chia seeds
- 2 Tbsp ground flax
- 1/2 cup almond meal
- 1/2 tsp salt
- 1/4 tsp nutmeg
- 1/4 tsp allspice
- 1 tsp cinnamon
- 1/4 tsp cardamom
Ingredients Wet Ingredients
Dry Ingredients
| |
- Preheat oven to 350F. Combine dry ingredients in a bowl, mix until evenly distributed. Combine wet ingredients in a separate bowl, stir until smooth, then pour into dry ingredients and blend with a spatula until all dry ingredients are coated. Shape cookies into balls, then press gently to flatten onto a baking sheet (using a silicon liner is very useful here!). Bake for 15 minutes, until golden brown, and remove when cool if using a silicon liner or immediately if using a baking sheet.